
.gif)


Adobe Photoshop Lightroom 5 Public Beta Overview
Update: according to official system requirements and some of our readers, Lightroom 5 Mac version can only be installed on Mac OS X 10.7 (Lion) or newer (official Windows support includes 7 SP1 and 8). I am yet unsure if such restrictions are only theoretical. We can only guess why Apple and/or Adobe chose to limit users in such a way. I’m sorry to say there’s really nothing I can do about it not having any sort of relationship with Adobe other than being yet another user. All older Mac OS X version owners wanting to upgrade to Lightroom 5 in the future can do is hope such feedback is received (or update their OS). After all, this is Public Beta release and, as such, the whole point of it is to collect feedback and gain user appreciation. In any case, I urge you NOT TO remove previous Lightroom version from your computers in favor of the Beta, which will expire as soon as final release hits the shelves.
If you’ve been following our website for a while now, you must have noticed I am a big fan of Adobe’s Lightroom RAW post-processing software. There are many alternatives to it, of course – DxO Optics Pro and Capture One making the toughest competition. I admit I haven’t had a chance to work with either one of those for a sufficient amount of time and make up my mind whether they’re better or not for me. And it would seem Adobe’s trying to make sure people such as myself never do stray. A few hours ago, they released the free Lightroom 5 Public Beta version. In this article, I will give you a quick overview of some of the new features Adobe’s planning to implement in its upcoming full release.
Usually, I would provide you with a link at the end of the article so that you can decide whether to try it or not after reading what I’ve got to say. This time, I’ll go as far as say – just go for it. It’s free, it won’t mess up your catalogs and won’t damage your previous Lightroom version in any way, and it’s the best way of actually knowing if you would find new features useful.
Click here to download Adobe Photoshop Lightroom 5 Public Beta through Adobe Labs website. Both Mac and Windows versions are available. You will need Adobe ID.
Hold on… What is a Public Beta Release?
Adobe has a habit of releasing unfinished, but working versions of Lightroom before the final release. These versions are made available for download and can be used for free by anyone, but for a limited amount of time. Lightroom 5 Public Beta will stop working once final version is on sale. Sometimes, several Public Beta versions may be available throughout the development as the team behind the project refines the software and adds new features.
Allowing photographers to use the “prototype” version is a good way of receiving some genuine feedback and making sure that, once Lightroom hits retailers, it’s as good as it can be. I can’t help but think it’s also a pretty darn good way of tempting said photographers into actually making the purchase – like a test drive, to show it’s worth the upgrade. Somehow, I’m pretty certain it is. Don’t take my word for it just yet, though. Let’s see what Lightroom 5 promises us thus far.
What’s New?
I remember when Lightroom 4 was released, there weren’t any drastic changes compared to its predecessor. Those that did take place somehow made the whole process of editing images that bit more precise and simple, and I found it to be a worthy upgrade. It is a similar story with Lightroom 5.

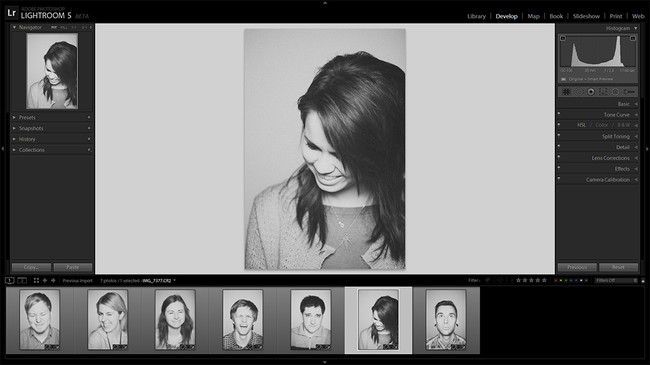
Once you’re done installing Lightroom 5 Beta and try to start the software, a message will pop-up. At this moment, Beta does not support catalog conversion (and that’s a good thing) and will let you know that a new catalog thus must be created. After that, everything goes as expected. Anyone familiar with Lightroom 4 interface should find themselves right at home. Even Presets and some of the other settings will be carried over from Lightroom 4 if that’s what you used previously. The successor to Lightroom 4 may eventually use different processing version to the now-current 2012.
2) Full-Screen Preview
The first thing I do when I open Lightroom 4 is hit the F key a couple of times to enter full-screen mode, and that’s what I did with the Public Beta. It didn’t work. Not the way I though it would, at least. It would seem Adobe’s made some changes to hot keys – in order to enter full-screen mode now, for example, you need to hit Shift+F (when using Windows). Hitting just the F key will engage full-screen preview mode, which will enlarge your image and hide all the panels. It’s obvious Adobe has given even small details like this a lot of thought. After all, previewing images is an action you are likely to do more often than change screen modes, and thus should require a simpler key combination. Neat and makes sense, but changes like these may take a little bit of time getting used to. I haven’t compared all the most-used hot keys yet, but don’t be surprised if you find more changes.
I find the full-screen mode preview a very simple and, it would seem, rather obvious feature, but I haven’t really missed it until I’ve tried. It’s sort of amazing. You can zoom in, too. I found myself using the F key rather often simply to better “take in” the whole image as I work on it. Full-screen preview does the job somewhat better than engaging Lights Out mode (hit L key to engage) for uncluttered image previewing, and also allows you to see how it looks on a black background (full-screen preview) and white background that I have my Lights Out settings set to.
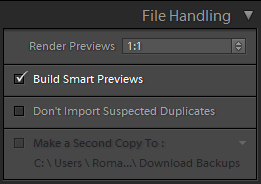
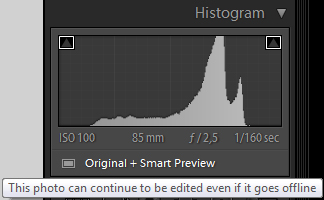
3) Smart Previews
4) Spot Removal Tool Improvements
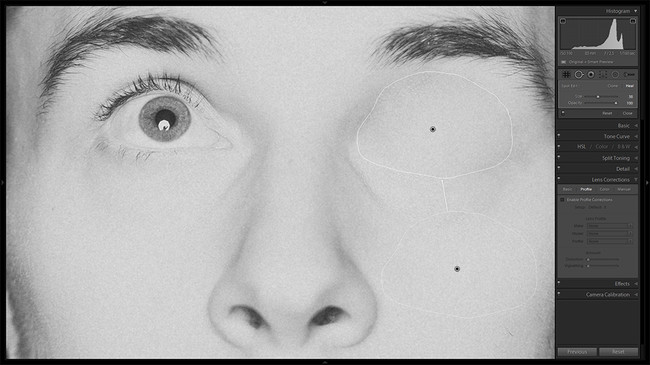
When I wrote the “How to Use the Spot Removal Tool” article, one of the main criticism some of you had was that in Lightroom 4 the tool itself is hard to use with larger, more complex objects. So, if you had to remove power lines from an otherwise glorious landscape image, it was extremely difficult and tiresome, and much more simple to do in Photoshop. In Lightroom 5, Spot Removal tool is now much more similar to Photoshop’s powerful Clone Stamp Tool. You can draw the shape you need and Lightroom will attempt to clone it. With the greatly added flexibility, all previous adjustments are still available. You can easily remove someone’s eye, should you wish so.

A completely new tool, Radial Filter acts much like Graduated Filter (next to which it is now found in the tool panel), but is, instead, radial. This makes it a very powerful Vignetting tool with all the same controls as Graduated Filter.

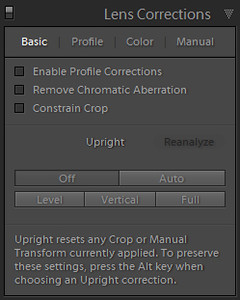
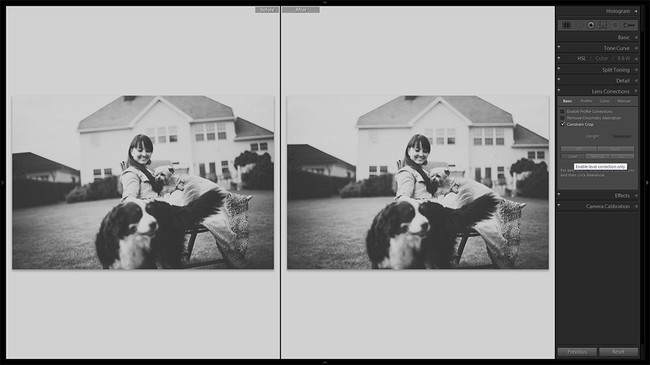
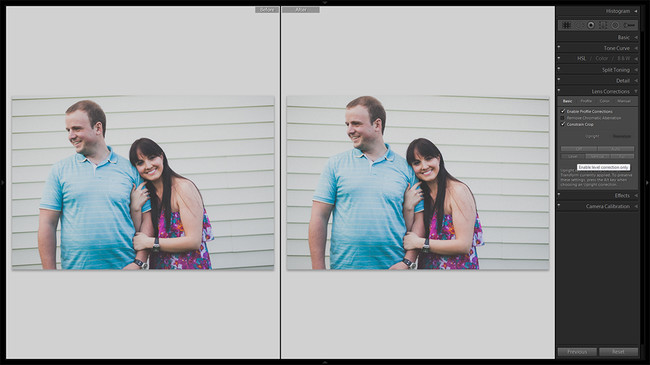
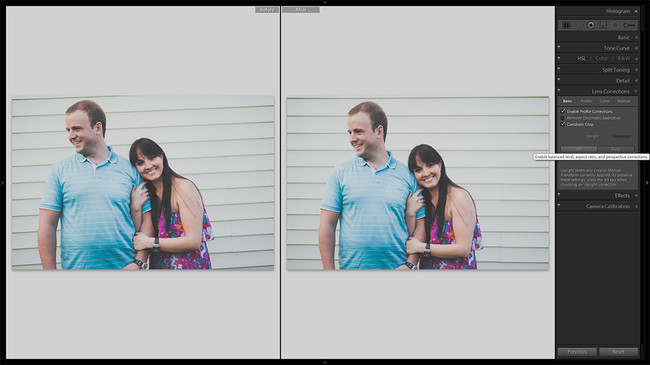
What you do need to keep in mind is that, good as it may be, Upright is far from being perfect. It’s still software that’s judging whether your image is tilted or not, and software is much more prone to make mistakes than you are in this case. Software doesn’t think. Here’s an example where Upright did a pretty good job straightening the horizon. I have Constrain Crop check box ticked to make sure there is no empty white canvas at the border of the image as a result of image rotation.