

.gif)


How to Make the Sky Blue in Lightroom
One of the biggest frustrations in photography is the fact that our cameras are not able to fully capture the light and the dark tones that we can normally see with our eyes, which is known as “dynamic range”. How many times have you seen situations when the sky is blue and beautiful, but it comes out very pale or gray in your photographs? There are other cases, when the sky is not blue at all, but you still want it to be blue in your picture. Gladly, the problem can be easily fixed in Lightroom, as long as the rest of the picture is fine.
In this tutorial, I will show you how you can transform the sky from light-blue/gray:


In the past, if you wanted to fix the sky in a photograph, you had to open it in Photoshop, then work with it through layers and masks. With the introduction of Lightroom 2, Adobe provided plenty of great functions within Lightroom without having to use Photoshop. These new functions truly save a lot of time, because you can copy-paste the same settings from one picture to another, especially when working with panoramas.
The best tool to fix the sky in Lightroom, without a doubt, is the “Graduated Filter” tool inside the “Develop” module. The only dilemma with the Graduated Filter is the fact that it works just like a regular Graduated Filter that is used in front of the lens while taking a picture, so if you have other objects such as trees and buildings mixed with the sky, those objects will also get affected.
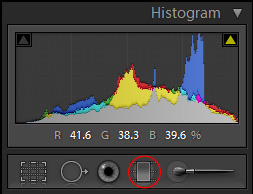
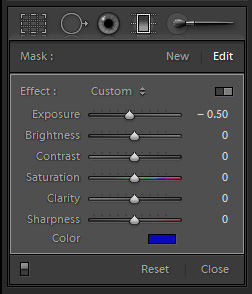
While the picture is selected, click the “Develop” shortcut from the top right screen or simply press “D”. Once you are in the Develop module, expand the right menu and find the “Graduated Filter” icon inside a panel that is right underneath “Histogram”:
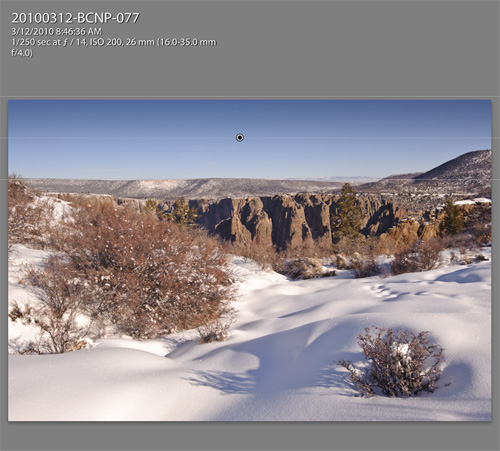
In the above image example, when I tried to decrease the exposure to “-1″, the sky got a little bluer, but not the true blue color I was looking for. In addition, as I pointed out above, if you do not have a straight horizon and have other objects in the frame, decreasing exposure will also darken those objects and might not necessarily yield a good overall effect. If you have a similar situation, try the next steps.
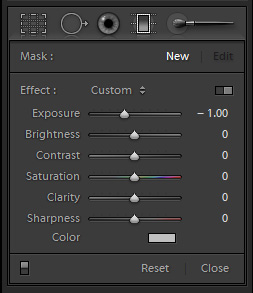
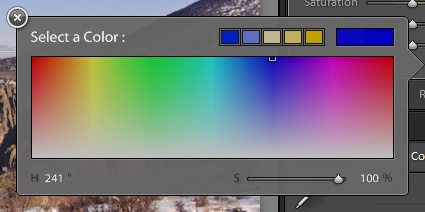
With the graduated filter selected (which shows up as a dot on the image), go to your “Exposure” setting and change it to “0″ or something small like “-0.5″. Next, click the square right next to “Color”, which will bring up a new window like this:
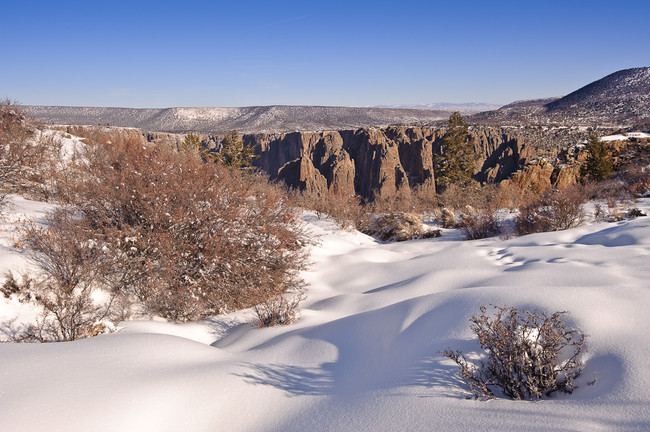
Definitely much better than what it was before!
2) Adjustment Brush
The second method is to use an “Adjustment Brush” tool within the Develop module of Lightroom. I recommend using this tool to fix the sky only when you have objects sticking out that you do not want touched. Take a look at this picture, for example:
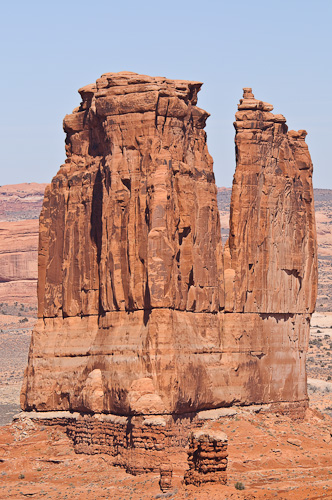
In situations like this, the Adjustment Brush (keyboard shortcut is “K”) works very well. It is located right next to the Graduated Filter in the Develop menu:
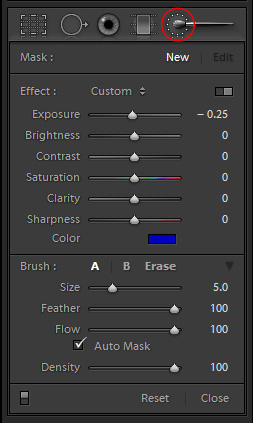
Here is what each of the settings does:
Size – controls the size of the brush
Feather – controls how far out the brush will start to fade for smoother transition. I typically leave this at 100 and lower it when working carefully around the edges.
Flow – controls the rate of flow of the brush. I typically have it set to 100. If you changed the number to 50, the effect would be reduced in half with a single stroke. If you applied a second stroke on the same area, it would be the same as using 100 in the beginning.
Auto Mask – will automatically avoid painting areas that do not match in color. Leave this checked.
Density – this is just like “opacity” in Photoshop. Leave it at 100.
Once you click on the Adjustment Brush icon or press “K” on your keyboard, the mouse cursor will change to a circle with another circle inside and a dot with “+” sign in the center. The inner circle is the brush itself and the outer circle is the brush feather. Change the feather and you will see that the outer circle gets smaller or bigger, depending on the number.
Start with the image zoomed in at 100% view. Use the brush to draw from top to bottom and paint all of the sky that you see in the image. If you accidentally brush over other areas, do not worry, because it is very easy to remove them later. Once you paint the sky, inspect the outer edges of your objects and make sure that they did not get painted. If you see some paint around those edges, simply press the “Alt” button and paint over those areas. You will see that your brush will be converted to a circle with a minus sign in the middle, which works as an eraser.
Here is how the above image looks after using I used the Adjustment Brush on it:

Whether you use the Graduated Filter or the Adjustment Brush, just make sure that you do not overdo it. There might be cases where these tools will not work and make your sky even uglier, so use these carefully and see what looks the best to your eye.
