How to Upgrade Lightroom 2 to Lightroom 3
This is a quick guide on how to upgrade Lightroom 2 to Lightroom 3. One of the good news for Lightroom 2 (LR2) users, is that unlike the beta version, the full version of Lightroom 3 (LR3) allows upgrading the LR2 catalog to LR3 catalog without having to re-import all images into a clean catalog. Also, Adobe allows keeping both versions of Lightroom on the same machine, which means that you can install LR3 and continue to use your old LR2 with the old catalog. Until performance issues are all addressed in LR3, I would keep both versions on the machine in case of failures or problems.
1) Download and install Lightroom 3
If you are hesitating about downloading the online version of Lightroom 3 versus buying a boxed version from a store, don’t – they are both exactly the same. Adobe lets you download the full version of Lightroom and use it for 30 full days until you input the serial number from a retail boxed version. This is a great way to try it out and see if you want to keep it or not. If you do, then simply purchase the retail version of Lightroom 3 later and when the package arrives, use the serial number to unlock the 30 day limitation – you don’t even need to insert the CD.
For now, let’s go ahead and download Adobe Photoshop Lightroom 3 from the following Adobe URL: https://www.adobe.com/cfusion/tdrc/index.cfm?product=photoshop_lightroom
Once the file is downloaded, install LR3 on your machine using the default settings. When Lightroom 3 asks for the CD key, choose the Try option to start your 30 day trial.
2) Upgrade your Lightroom catalogs
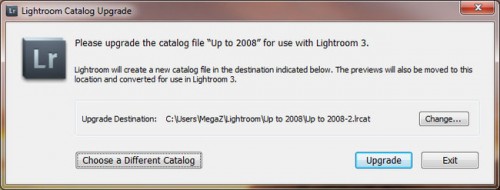
After the installation process, you should see the Lightroom 3 icon on your desktop. Double-click the icon to open up Lightroom 3, which will fire up a dialog box that looks like this:

3) Make sure that all images are available and visible
Write down the total number of photographs in your upgraded catalog, then close LR3 and open LR2. Look at the total number of images in LR2 and make sure that the numbers match. Close LR2, open LR3 back again and then go through some random images and open up 100% views to make sure that the images are all there. Wait for thumbnails to regenerate.
4) Review Collections and Presets
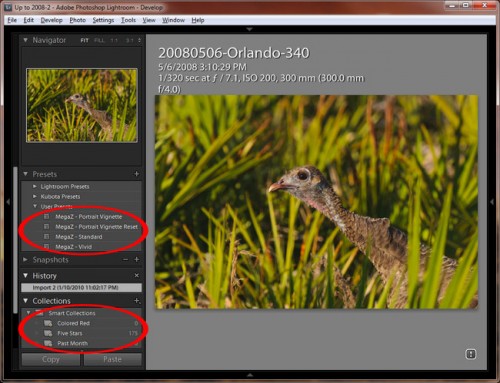
Make sure that your Collections and previous Presets are all preserved. LR3 and LR2 should be sharing the same preset folders, so those should work by default. Collections and Keywords are from the upgraded catalog, so if the upgrade was successful, you should see them as well.

5) Review Import Settings
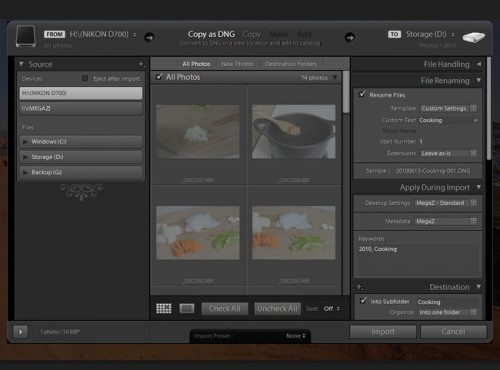
One of the first things you will notice after you upgrade to Lightroom 3, is the Import Photos screen. Adobe has completely redesigned the Import Photos screen and many new features have been added to it. This also means that your old settings will probably not work anymore and you will have to reconfigure the import dialog. After I upgraded the catalogs, I had to redo the “File Naming”, “Apply During Import” and “Destination” settings from scratch – nothing was transferred over from LR2. Here is how the new import dialog looks like:

Lightroom 3 does not modify the settings in your photographs during the catalog upgrade. This means that your photos stay the same way, unless you choose to “Upgrade” them to the latest LR3 version. I highly recommend upgrading the “Process Version” of all images after you upgrade, in order to take full advantage of all of the new features that are available in LR3. See my “Lightroom 3 Process Version” article on how to do this step-by-step.
Repeat steps #2 to #6 for every Lightroom 2 catalog that needs to be upgraded.
7) Verify Export Settings
Lightroom 3 now comes with “Publish Services”, which lets you export your images to your hard drive or online Photo galleries such as “Flickr”. Make sure that your export settings for Hard Drive are preserved (mine were preserved for all upgraded catalogs) and if anything is missing, make the necessary changes and try exporting an image.


.gif)


