
.gif)


Lightroom Tips for the Develop Module – the Magic Alt Key
This feedback (visualization) take some of the guess work out of how the adjustment you are making is affecting the image. Here are some of the useful visualizations available in the Lightroom Develop module:
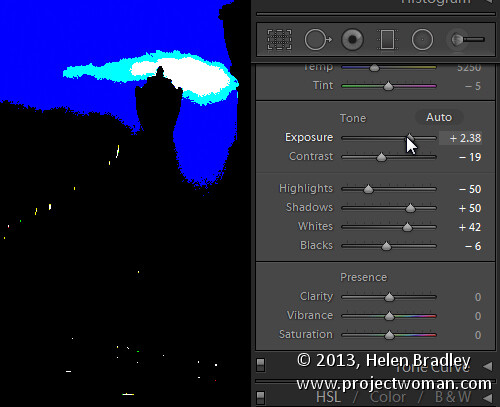
Alt and the Exposure, Highlights, Whites, Shadows and Blacks Sliders
When you hold Alt (Option) and drag any of these sliders you will see any areas where whites or blacks are clipped as a result of the adjustment – the color shows which channel is being clipped. When you adjust Shadows and Blacks the white areas of the image aren’t clipped.
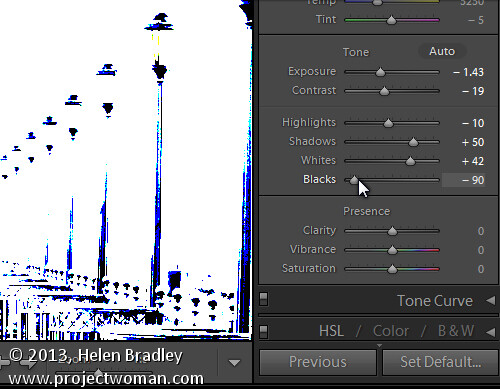
When adjusting Exposure, Highlights and Whites – the black areas are not clipped.
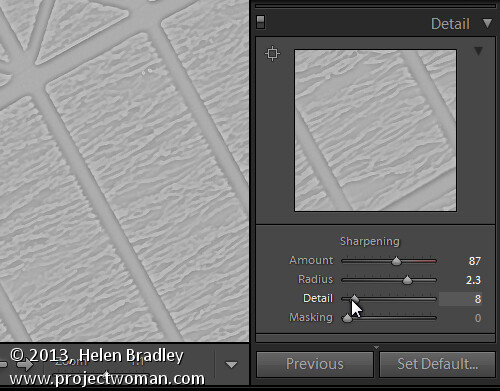
Sharpening
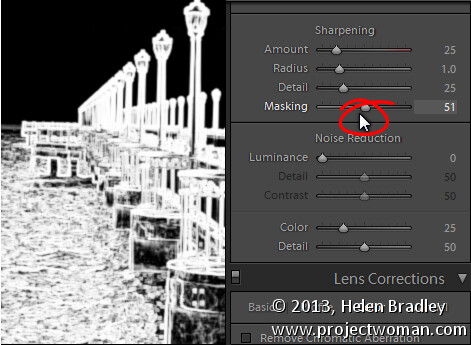
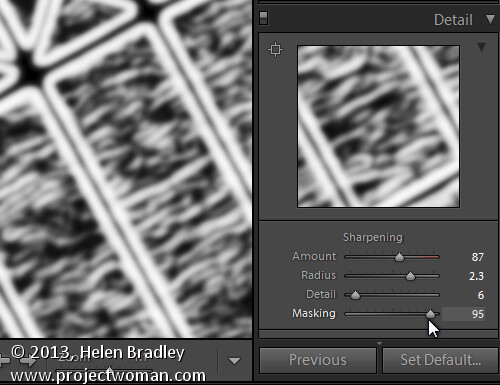
When adjusting Sharpening you can preview the result of the sharpening on the image by holding the Alt (Option) key and drag on any slider. Alt (Option) and the Amount slider shows you the sharpening applied to a black and white version of the image – as Lightroom sharpens only the luminance and not color this gives you a better view of the sharpening result.
Alt (Option) with the Radius slider shows the halos being applied to the edges in the image to sharpen it.

Alt (Option) and the Detail slider shows the suppression of the halos occurring as you drag on this slider.
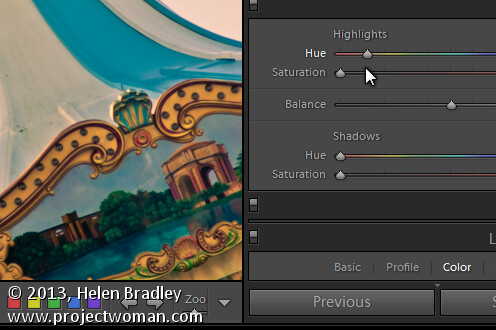
Split toning
Alt (Option) and either of the two Hue sliders shows the currently selected hue in place on the image even if the Saturation slider is set to zero. This lets you see the color you are selecting, at 100% saturation, before you apply it.
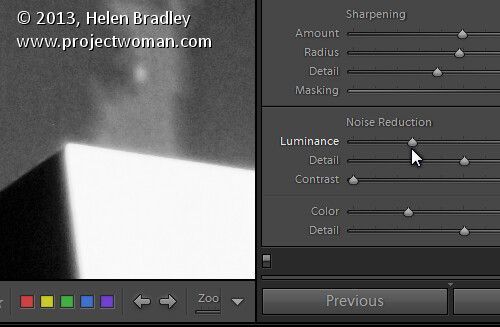
Alt (Option) and the Luminance, Detail and Contrast sliders for removing noise converts the image into a black and white image so you can see the effect of the adjustments more clearly.
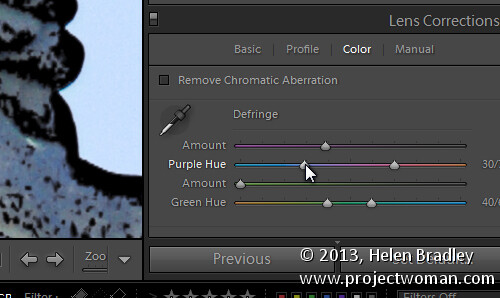
Alt (Option) and the appropriate Amount slider shows the areas in the image affected by fringing. White is not affected and you will see any areas affected by purple or green fringing.