
.gif)


.jpg)
How to Reduce Moiré in Lightroom 4
In this article, I will show you how you can reduce the effect of moiré in the upcoming version of Lightroom 4. With the release of the Nikon D800E, which has a different low-pass filter compared to the regular version of the D800 (see Nikon D800 vs D800E), it seems like Nikon opened up a can of worms as it relates to a phenomenon known as “moiré“. For the first time, Nikon is letting photographers pick between two versions of the same camera: one that yields sharper images at a cost of potentially having moiré in images (D800E) and one that yields slightly softer images but has no issues with moiré (D800). This quickly created tremendous interest from photographers, many of whom never even heard of the term “moiré” before the Nikon D800E. Questions started pouring in from everywhere and I spent quite a bit of time trying to explain what moiré is all about and how one could avoid or reduce its effect. This seems to be a primary concern for landscape and macro photographers that also enjoy photographing architecture and portraits (where moiré is seen quite often). Below you will find detailed instructions on how to reduce the effect of moiré in Lightroom.
Can Moiré be completely removed in Lightroom?
As you may have noticed, I used the word “reduce” instead of “remove” in the header of this article. That’s because the moiré pattern often cannot be completely eliminated with a non-destructive editing application like Lightroom (except for mild cases of moiré), especially when moire damages the texture. Photographs with very visible and large moiré patterns in the Luminance Channel can only be completely fixed in Photoshop, which is a cumbersome and time-consuming process. In many cases, you have to sacrifice details to remove moiré completely. This is the reason why I have been recommending most of our readers to buy the regular version of the Nikon D800 instead of the D800E. The latter is a specialized tool for dedicated landscape and macro photographers that want to get the best out of their equipment. The last thing you want is introduce another step to your workflow in order to clean up moiré, just because you picked up the wrong camera.
Please note that the below instructions will only work with Lightroom 4. The previous versions of Lightroom do not have any moire reduction tools. Please also note that the below tool works best with the original RAW file.
Using Adjustment Brush to Reduce Moiré in Lightroom 4
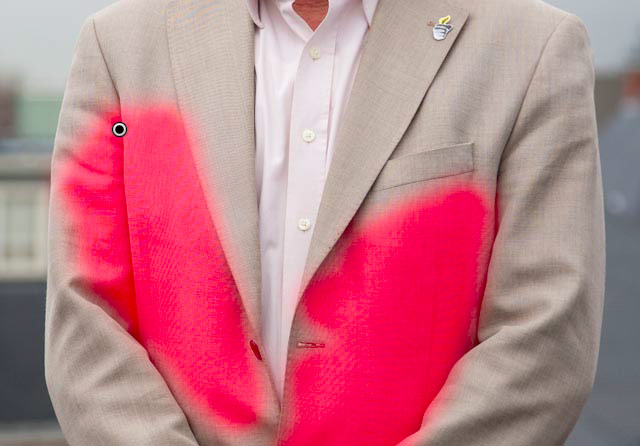
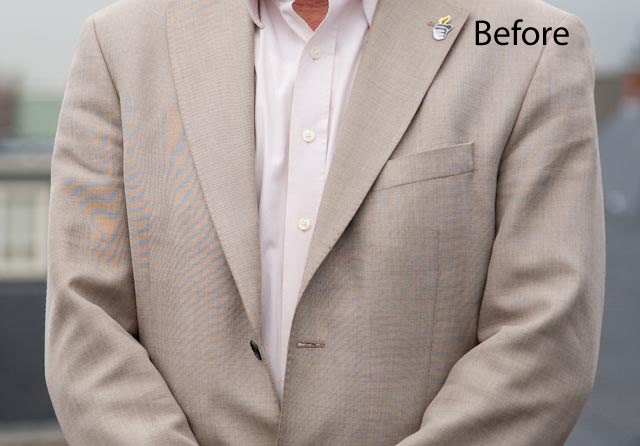
Let’s get started with the same jacket image I presented in “what is moiré” article. I decided to use this image, because it has a very strong moiré pattern with a yellow and green rainbow discolorations. This type of moiré is very hard to fix in post-processing and it requires use of Adobe Photoshop to completely get rid of it. Here is the image we will be working on:

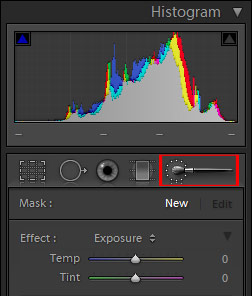
Once you have the photo with moiré imported into Lightroom, go to Develop module (press the “D” key on your keyboard), then click the “Adjustment Brush” (or press the “K” key):